Kanawha Trace 25K Race Report

Earlier this week, I was struggling to decide what race to do this weekend. There were several quality trail running events in the area, including: Lost Turkey Trail 50K and 50 Miler, Appalachian Front Trail 50K, Run with the Deer Flies 25K, and this race, the Kanawha Trace 50K, 25K, and 10K.

My wife and I argued throughout the week on how to appropriately pronounce “Kanawha” because she claims the “wh” is silent and I refuse to admit this is possible. What do you think? If you think the “wh” is silent then I don’t want to hear from you. Otherwise, please get in touch.

On Friday, I finally committed to entering the 25K at the Kanawha Trace. I knew I wouldn’t be able to push a 50K and be happy with the result. In the end, I’m glad that I decided to do the 25K. For a while now I’ve wanted to get into one of the southern WV trail races that WV Mountain Trail Runners has a hand in, so I was expecting a well-run event.

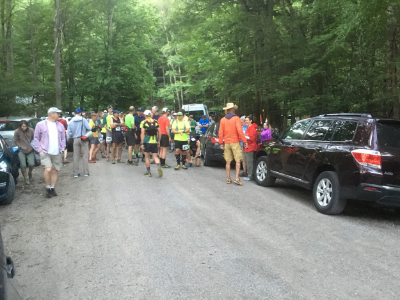
I wasn’t interested in staying overnight nearby so the 9:30 start time of the 25K allowed me to drive in on the same day. The 50K group had already started at 7:30. Packet pick-up was at the Arrowhead Boy Scout Camp. Even having signed up late the night before, the crew had my packet prepped. They’re on the ball. The race shirts were great quality and a nice shade of royal blue. No weird colors here!

The logistics were a little confusing, since I’m not from the area, in that there was a shuttle bus ride to the official start line about 4 miles down the road from the camp, so you still need to account for that extra time required. And mentally prepare yourself for a slightly muggy school bus ride. Being late July in these Appalachian hills, thunderstorms and humidity rule.

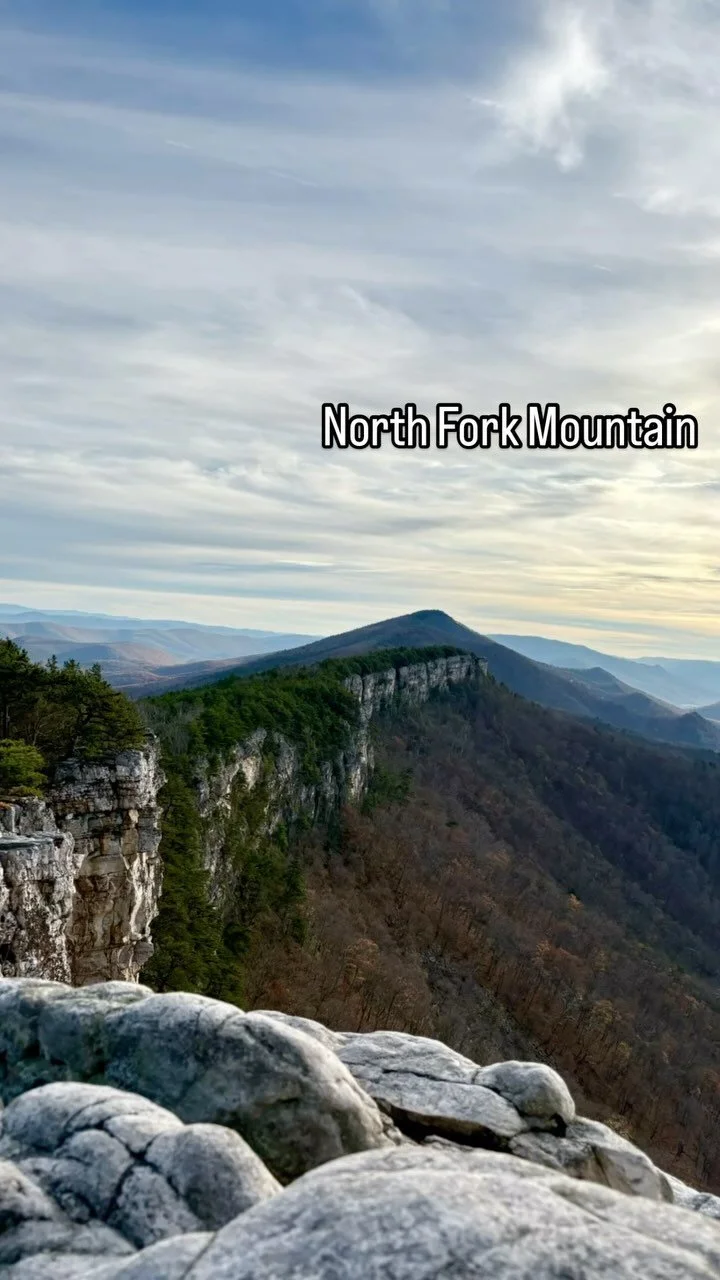
The start is in a residential area of Barboursville, WV and requires just over one mile of paved road running before getting to the real trails. When I finally arrived at those trails, I received a big punch in the face. The course immediately begins climbing over 300 feet in about three-fourths of a mile. The hillsides are steep in that region and require frequent switchbacks to the keep the task even somewhat reasonable.

Having started with the 10K runners, I had to make it a point to run my own controlled race and not get caught up in competing with the high school boys doing less than half of my distance. Even still, I watched several of them fade back to me in the first three miles because there is just so much climbing early on. And they probably aren’t accustomed to racing distances beyond their 5K cross country meets. I remember those days. The days before I was old and #dadstrong.

It was much easier to keep track of the people in each event because of the varied race number colors. The 10K folks had yellow while the 25K’ers had orange. The 50K racers had white numbers but the only time I encountered them they were heading the opposite direction from me. These colors coincided with the flagging and signs used along the course, minimizing possible confusion. Smart.

Apparently it had rained the night prior because much of the course was wet. At the bottom of one early descent, I watched a 10K racer bite it right in front of me when he stepped onto a chunk of wet, filmy sandstone. I nearly stepped on him. He didn’t stay down too long, but that had to hurt.

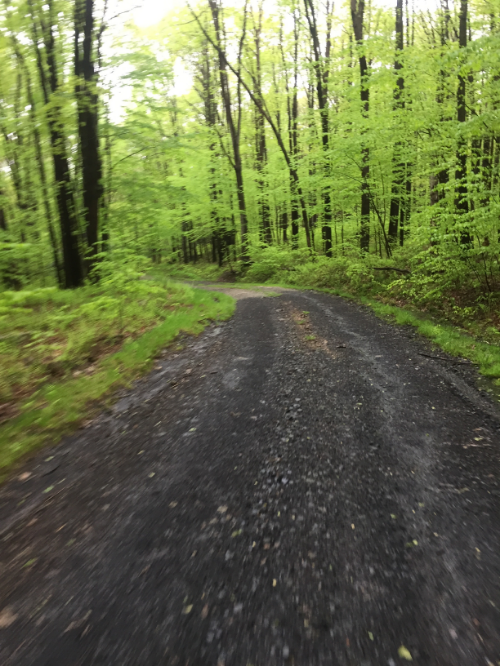
Just as I was arriving at the second aid station at mile five, I downed the banana I had been carrying, which the crew managed to catch in this photo. Intense, right?! Well, anyway, check out that sweet piece of singletrack. 

Mile 5 marks the split of the 25K and 10K races. Shortly thereafter I descended a steep and slick ravine on paths that resembled game trails. The trail was nothing less than challenging and ultimately resulted in my butt hitting the muddy ground. As I reached the next valley and wooden bridge crossing, I came upon two beagle dogs in the trail. They were apparently scared of me and started running away on the singletrack. They ran in front of me for what seemed like a mile, serving as an unexpected pace crew and welcome distraction. Thanks beagle dog crew! Hopefully they went back home, wherever that may be.  

It wasn’t too long after that where I encountered a less helpful dog. It was a sizable mutt somewhere along a gravel road. I thought I was going to have to defend myself as it was lunging, snarling, and displaying its white teeth. Crazily yelling at it must have worked. Good riddance.

There was rarely a time in this course that I felt like I was running in a valley or along a ridgeline for long - the terrain was frequently fluctuating. This race has a little of every possible scenario: long steep climbs and descents, short steep climbs and descents, long gradual climbs and descents, gravel road, paved road, wooden bridges, singletrack, off-camber, game paths, clay mud, sandy mud, doubletrack, switchbacks, freshly mown grass paths, gas line right-of-way, rock drops, giant rock overhangs, cliffs, large loose rocks, timber roads, several log jumps, and a couple of local residents’ yards.

I went off course slightly in two different locations but for the most part I found it to be very well marked. The color coding was super helpful and the signage at intersections plentiful.

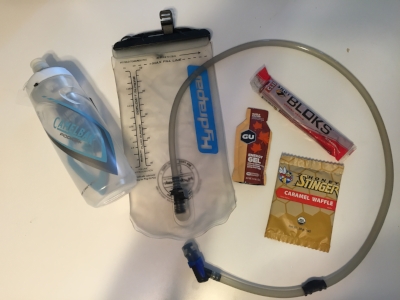
As fatigue set in, I began catching myself wanting to hike on some of the climbs where I would normally trot slowly, so I knew I needed to bring in some calories soon. But I also realized I had only packed a banana and a gel, underestimating the toll of these crazy climbs. It became clear why the total elevation gain of the 50K and 25K are only 1000 feet different: there’s a ton of climbing in the beginning of the 25K course. Taking the gel too early would be just as disastrous as taking it too late.

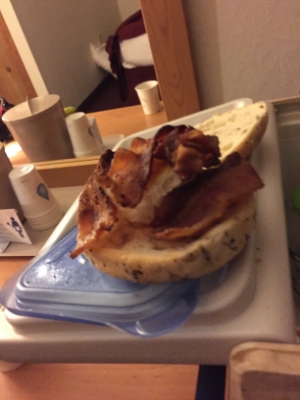
It was during mile 9 that I ran under a really neat rock overhang where I was imagining a family of American Indians several hundred years ago seeking shelter from a summer thunderstorm. And eating. Mostly because that’s what I wanted to do. Good thing there’s an aid station at mile 10.

Taking my sweet time at the 10-mile aid station in favor of surviving what had clearly become a toughman challenge, I took a gel with several cups of water and put a cup of ice in my hat. That mix made me feel like running again for a couple miles but I was definitely feeling heavy fatigue by the time mile 13 came around. Thankful that the climbs at this point were brief as I rolled along a ridge, the focus became holding my technique together and trying to use the terrain advantage to negative split. I knew there should be a big descent not long before the finish.

As I finished that descent and the end of mile 15 approached, I must have let my guard down a little. There was a brief climb and a quick descent toward the Mud River where I stepped onto a large, wet, cambered rock, only to fall hard onto my right wrist and leg. Unlike the first fall, that one hurt and took some of my skin with it. I don’t usually fall in trail races and now this was number two for the day. Clearly it’s a bit of a technical course and the recent rain had made it more treacherous.

The low blood sugar bonk had kicked in by the time the last mile came along. My form had degraded as a result but I knew from the elevation profile that there were no more climbs or descents. Please, no more! Stubbornly focused on keeping my core stable and arms from flailing, I could finally make out the pond at the Boy Scout camp through the trees.

In the end it was 16 miles in 2:19:01 to win the 25K race and barely set a new course record. The new record was my ultimate goal, so I was very happy with that result. Plus, my wife won the women’s 10K! Congratulations to her! Maybe she will start saying the "wh" in Kanawha.

The volunteers greeted me at the line with this wild, wood finisher medal and custom crock.

As usual, the WVMTR folks put on a great event. Check it out next year if you can. I’m sure most of them will never read this but events like this are successful because of the volunteers and race directors. Thank you!


The art and science of exercising in the summer heat

Your body is finicky about its temperature, which means it will carry out whatever processes are necessary to stay within the best working range. And that includes slowing you down when you go outside to exercise.

In a hot environment, at rest and with activity, blood is diverted to the skin for cooling purposes via increased sweat production. The sweat on the surface of the skin leads to a loss of heat via convection and evaporation (hooray for science). It’s a pretty awesome and effective system - as long as you aren’t working at really high effort levels or in a really hot and humid environment.

Sustained exercise causes a shift of a portion of our blood volume to the working muscles. And the bigger the muscle used, the bigger the blood supply required to keep it going. Harder efforts will inevitably use more energy at a quicker rate and therefore increase your core temperature to even higher levels than easy efforts. That’s where the sweating mechanism gets a little more inefficient as you are generating more heat than you can get rid of. High humidity also affects the cooling mechanism because the evaporative efficiency of sweating is reduced.

And then we add a third concern: dehydration. Dehydration decreases overall blood volume which magnifies the blood distribution problem further. This means there’s less blood volume for cooling and less blood volume for working muscles. This does not mean you need to go overboard with drinking water, as you could end up in a dangerous state of hyponatremia where you have actually diluted your body’s electrolytes. This ultimately wreaks havoc on your brain function and can lead to death. Some level of dehydration is expected during hard exercise in hot conditions, you just don’t want it to get out of control. Drink to quench your thirst and do not try to drink excess amounts to “stay ahead” of water losses.

Unfortunately, when it’s hot, the body uses more of its stored carbohydrate, glycogen, for energy. This may not be much of a factor for a 30-minute run, but if you intend on racing a marathon you must consider it a factor because you are hoping for your glycogen stores to last as long as possible.

You might think you can compensate for that increased glycogen loss by eating more during longer runs, but there are still a couple problems. One problem is that when the core blood volume is reduced to maintain cooling and supply working muscle, there isn’t much blood left for the internal organs, particularly the intestines and stomach. The other problem is that any carbohydrate you take in while exercising in the heat is used at a slower rate.

With the loss of blood volume to the digestive organs, your stomach might feel like it has a brick in it after deciding (too late) to eat that first gel at mile 10 when you realize you are suddenly feeling woozy. Is it the heat? Are you dehydrated? Was it the pre-race pasta dinner? It’s just poor planning and underestimating Mother Nature.

Those gels are meant to be consumed with large amounts of water: 6-10 ounces. Guess how much water is in one of those little aid station Dixie cups? Probably 1-2 ounces. Gels are a very concentrated source of calories, so the proper amount of water needs to be included to dilute them or it will often upset your stomach.

Once the woozy bonking has started, it’s usually too late to get those calories in quickly and maintain your pace, at least for a few minutes. So back off the pace, eat, and then reassess. You can keep the workout from being a complete disaster by making that choice to slow down for a mile and getting in some extra calories and fluids when you first notice a decline in performance and mental state. A slower than expected race finish is better than a DNF, and slowing down on a training day is better than needing your significant other to come pick you up in the car. Nobody needs to see your Road ID bracelet today.

Prevention is the optimal solution for feeling well and having a decent race or training day when the heat is brutal.

Most of us are capable of absorbing around a liter of water per hour but for prevention all you would need to do is drink 16-20 ounces of fluid per hour. I’m saying “fluid” because you may like energy drinks, but realize those don’t always work well in the heat for the same reason the gels can be a problem; too many calories and not enough pure water can slow the rate that fluids are absorbed in an already stressed digestive system.

You should also consume a small amount of calories early and often. Maybe you normally take in 100 calories per hour starting at 45 minutes in a 2- or 3-hour event. Well, you might start at 25-30 minutes instead and try to do it in smaller quantities and at more regular intervals. You might see if you can get in 110-130 calories in an hour instead. And preferably use something you have eaten in hot weather and at a high effort before. There’s nothing worse than experimenting on the day of a competition. Don’t blame me if you haven’t tried these things out before race day.

If you can pull it off, it is wise to use ice and cold water to help regulate your body temperature before and during exercise. During my most recent long run, which lasted 2.5 hours in the middle of a humid 90-degree day, I sat or stood in four creeks for 1-2 minutes each. I’m sure some purist runners would have a problem with mid-run stops, but I consider it a way to ensure success and consistency in pacing for the remainder of the run. You can also chew on ice, use wet sponges or clothing, and place ice within your hat and clothing. If nothing else, the cold is a nice distraction.

Proper pacing or effort dosing is critical in prevention. Expect the worst if you plan to start out at your PR pace on a humid 85-degree day. The calculator at this link can help guide pace adjustments. It’s probably not going to be a PR kind of day but finishing strong would be nice wouldn’t it? It’s also not the kind of day to do speedwork or long, hard pushes in a competition.

A huge part of prevention is regularly having heat exposure during exercise leading up to a particular event. This is the reason why you will experience a disaster day if you always train early in the cool mornings or only exercise indoors at a 65-degree gym. Your body is exceptionally good at adapting to the stressors consistently placed upon it. Try to have the heat exposure for at least two weeks prior to a hot competition or big training day.

Some other thoughts:

  • Plan ahead by checking the weather forecast before you head outside.
  • Try to exercise in shaded areas to avoid direct sun exposure that will heat you more.
  • Figure out ahead of time if you are going to develop blisters from wet socks and shoes by going for multiple brief runs with the shoes and socks wet. Shoes that are well broken-in are less likely to be a problem.
  • Wear light-colored clothing.

Clearly, exercising in a hot environment requires your body adjust to not one but many stressors: your working muscles, increased need for temperature regulation, and increased demand on glycogen energy stores. Training or competing in the heat doesn’t have to be dangerous if you are otherwise healthy, well prepared, and plan appropriately.

Seek medical attention if you have any of the signs and symptoms of heat illness:

  • Headache
  • Nausea
  • Vomiting
  • Pale, ashen, or flushed skin
  • Loss of sweating
  • Confusion
  • Loss of or changes in consciousness
  • Excessive fatigue
  • Sudden onset of weakness
  • Visual disturbances
  • Chills
  • Severe muscle cramping
  • Severe stomach cramping

Stay safe out there. Share this article with all of your exercise buddies. If you have any training questions contact me at derek@mountainridgept.com.


Strength Training for Runners, Part 4: Application

Now that you have been bitten by the strength training bug, let's go over some application specifics regarding the amounts of resistance and repetitions to use for your desired gains.

The strengthening goals for each muscle group don’t need to be the exactly the same. You can challenge each muscle group in a way that encourages certain results, all within the same workout.

You must decide whether the specific motion you are working would benefit from:

  • awareness, skill, and control
  • endurance
  • strength endurance
  • pure strength
  • power
  • any combination of these factors

For instance, you can work the lateral gluteals (gluteus medius, gluteus minimus) for 1-2 sets of 15-30 repetitions for awareness and fatigue resistance on the same day that you perform heavy squats in 2-3 sets of 6-10 repetitions to increase strength of the gluteus maximus, quadriceps, and hamstrings. Plus, the lateral gluteals are still going to do a little work during the squats.

Progressive strength training phases

The repetition values provided are based upon certain percentages of a concept known as a “one repetition maximum,” which is the amount of weight you can move for a single repetition only.

You can use an online calculator like the one found here (http://www.exrx.net/Calculators/OneRepMax.html) to determine your one repetition maximum for the major lifts, like squats, if you are really curious.

A strength coach in a power or strength sport like football would really be concerned with one repetition maximum values. Sprinters or jump athletes could benefit from that information too. But as a distance runner, you don’t need to perform true one repetition maximum tests if you are just trying to supplement your run training for injury prevention and moderate performance gains.

And that’s for a few reasons:

  • A one repetition maximum value can easily be estimated from something like an 8, 10, or 15 repetition maximum, hence the above online calculator.
  • Distance running never uses maximum force muscle contractions so it is less critical to know exact repetition maximums for 1 to 5 repetitions.
  • I’d rather you keep it simple and at least do the strength training than have yet another deterrent to doing it.
  • Someone that’s just beginning strength training may be alone while training and you should never perform that type of maximal test alone.
  • Early on, a single maximal lift should be avoided if the technique isn’t excellent. Technique trumps force any day.
  • Most people don’t want to do a maximal lift anyway.
  • Runners need to emphasize core stability exercises, and those aren’t the types of exercises where you try to find a one repetition maximum. The best core exercises are those that you progressively make unstable by varying the positions or simply holding the stable positions for longer periods. That’s also a great way to multitask. A basic plank from the forearms can be progressed to a plank with the arms straight to a plank with arms straight while doing leg raises. For core work, you need to emphasize strength endurance and stability, at the hardest.
  • It’s easy to use the “do it until you can’t do anymore” method as a beginner for the big muscle groups like the quadriceps and hamstrings. If you are able to do more than 15 reps of squats then clearly you are working more of an endurance component. Armed with that information in the next session, if you wanted to focus more on strength endurance, you can add a reasonable amount of resistance and perform the exercise again. Let’s say this time you just can’t do anymore at repetition number 14. If you went by the ranges in the training phase chart, you would fall in the 65-70% of one repetition maximum range. That’s a good sign because you are now at least working in the strength endurance realm. A little more weight and you will find yourself in the strength building range, which is very difficult at 80-85%.

Major running muscle groups and suggested training progression

The muscle groups in the orange rows progress from awareness/skill and tend to be those that you can isolate to work frequently with high repetitions. These are the muscles that often need to be addressed in the clinic because they are poorly utilized and under-trained.

The other muscle groups in the red rows are those that runners commonly use so they primarily need challenged for endurance, strength endurance, and strength. These are the big, primary movers.

After strength training for a month or two, you will have a better idea of where you are in the training phases table. Assess each exercise and then adjust the resistance accordingly to change phases based upon the strength goal you want to achieve. For the big muscles, early on, you want to linger in the endurance range and then try to progress to the strength endurance range. There is a ton of benefit in most people by just staying in the strength endurance range for a month or two. For the smaller muscles there is no shame in staying at the awareness or endurance levels for many months. Even if you chose to add resistance to challenge the small stabilizing muscles, it should be minimal. 

If you really want to optimize performance from the large muscle groups, then by all means, progress into the true strength building resistances after you have a couple months of experience. But most people don’t want or need to push that limit with high frequency. Most runners that have previously avoided strength training are going to find benefit in focusing on strength endurance capacity.

Next week, for the last article in this series, I will share a few of my favorite exercises. 

Please let me know if you have any questions at derek@mountainridgept.com. If you enjoy reading these articles and applying them to your training, please “like” the Mountain Ridge Physical Therapy Facebook page.

Strength Training for Runners, Part 3: How?

So hopefully I’m persuading a few runners to try adding strength training to their regimen. Let’s go over some general strength training tips and the primary objectives to consider for the various muscle groups.

Strength training tips and objectives

1. Your primary goal is to place a stress on the body that it isn’t accustomed to and that, in some ways, exceeds the stress that running places on the body. This demand is what leads to positive adaptations.

  • Efficient running is stressful for the muscles, tendons, bones, joints, and other tissues in the body.

  • Inefficient running is even more stressful on many of these structures, which means you want to either get rid of the inefficiency (ideal) or make your body more tolerant of it (not ideal).

2. The progression should go as follows: mobility → skill → stability → endurance → strength → power

  • This means you need to master the basic movement pattern with a full range of motion far before you attempt to move heavy amounts of weight or move explosively.

  • Running requires tons of repetitions of a powerful movement yet many people don’t have the basic mobility and strength down to safely use that power.

3. Circuit train, especially if you aren’t accustomed to strength training yet.

  • Runners love to stay moving, so your earliest forays into strengthening can emphasize circuit training of the entire body. Circuit training allows you to move right from one exercise into another, bringing the heart rate up and providing a similar feel to the constant work of running that we crave.

  • Circuit training is more reasonable from a time-management perspective.

  • If you are new to strength work, alternate upper body, lower body, and core exercises to let each muscle region recover effectively in between exercises.

  • More experienced athletes can stack a single set of two or three similar exercises together to increase the muscle demand. For example, lunges followed by single leg squats and then on to step-ups.

  • You can add plyometric and agility drills throughout the strength session to keep the heart rate up and integrate running with speed, which is discussed next.

4. Integrate strengthening into your run workouts to improve your awareness of how to use those muscles while running.

  • Going back to circuit training, here’s one of my favorite winter activities when the weather is horrible and I must run inside:

    • Treadmill run 5 minutes

    • Hip strengthening and stability 1-2 minutes

    • Core strengthening and stability 1-2 minutes

    • Leg strengthening 1-2 minutes

    • Wash, rinse, and repeat for 45 to 90 minutes total

  • Perform a couple of bodyweight resisted exercises like leg raises or planks during your warm up to emphasize core and hip stability, strengthening, posture correction, and muscle awareness.

5. The abdominals (and actually some hip muscles) are primarily stabilizers when you run so learn to use them in that way.

  • Instead of crunches or sit-ups, use variations of planks and bridges.

  • Emphasize single leg activities with the pelvis held in a level position. I reviewed the pelvic position last week with the Trendelenburg's sign.

6. Work one side of the body at a time.

  • Symmetry in muscle strength is a key point. Working both sides of the body at the same time is less challenging and less productive because you will inevitably use a more dominant side without even realizing it.

7. Work multiple muscle groups simultaneously by emphasizing “closed chain” movements.

  • Closed chain implies the end of the leg or arm will be in contact with the ground or fixed object. Examples include squats, lunges, push-ups, step-ups, power cleans, planks, pull-ups, and most plyometrics like jumping and hopping.

  • Closed chain movements mimic running and normal daily activity. Open chain exercises, like leg extensions, do not often duplicate our day-to-day movement.

8. Think about performing exercises by the plane of movement that you move each joint through and then do a little work for each plane.

  • Squats and lunges emphasize a forward/backward plane at the knees and hips.

  • Single leg hip rotations emphasize a horizontal plane at the hips.

  • Pelvic drops emphasize a side-to-side plane at the hips and trunk.

9. When an exercise has become too easy, add an element to decrease stability and see if that doesn’t increase the difficulty.

  • For example, a standard front plank is easily advanced by lifting one leg, one arm, or both at the same time. The idea is to increase the wobble factor.

  • Some equipment options to increase instability include swiss balls, BOSU balls, and wobble boards.

  • Many standing exercises can be performed on a single leg to challenge the stability but you need to be proficient with their double-legged versions first.

10. Avoid using machines, emphasize free weights.

  • The limited range of motion keeps you from working in the positions that you actually need to gain usable strength.

  • Machines do not challenge the stabilizing muscles and nervous system components that can be beneficial for injury prevention and optimal performance.

  • Free weights are more likely to mimic the tasks that we perform in daily life because we commonly lift and move heavy objects.

11. Reduce strength training loads primarily in the week before your “A” races but not before “B” or “C” races.

  • Strengthening is part of the constant stimulus that you are trying to adapt to, so you don’t want to recover excessively before your low priority events. Train on through.

  • While training just before a low priority event you can decrease the number of repetitions in a set by 3-5 but keep the weight the same.

  • Before an “A” race, decrease both the sets, resistance, and repetitions if you have been working with resistances that cause failure at higher repetitions (i.e., do only 1-2 sets of 15-30 repetitions instead of 2-3 sets of 15-40 repetitions). If you have been gearing up with really high loads and performing more powerful, explosive moves, then back the sets down and the resistance only slightly (ie. do 2-5 sets of 3-8 repetitions instead of 5-6 sets of 3-8 repetitions).

12. Once your priority event has passed, back off of the rapid power and agility movements and encourage basic strength and strength endurance again for 2-4 weeks.

13. Perform strength training on shorter or less intense running days, especially if you have never strength trained before.

  • We don’t need too much of a good thing. Too much exercise stimuli in a day or series of days is a recipe for injury.

  • I often still use running as a brief warm-up before strengthening and, as mentioned, incorporate running drills throughout the strength workout.

  • Strength days are a great time to do other cross training on a bike, elliptical, rower, rock wall, or anything that allows you to experiment and break up the monotony of running.

14. A general initial strengthening structure could consider spending:

  • 50% of the time on the large primary movement muscle groups that undergo heavy use in running to improve overall movement strength and strength endurance.

    • These muscles, like the quadriceps, gluteus maximus, and hamstrings, can be pushed harder with higher resistances.

  • 25% of your time focusing on the muscle groups that are not dominant and become neglected in the running motion to prevent injury.

    • These muscles, like the deep gluteals, usually require very little resistance because they are not large or power producing.

  • 25% of the time integrating plyometric drills to increase power output, speed, and agility.

15. Allow at least 6-8 weeks of working at least 1x/week for noticeable performance changes.

In next week's blog I'll go over more application specifics and exercises. 

Please let me know if you have any questions at derek@mountainridgept.com. If you enjoy reading these articles and applying them to your training, please “like” the Mountain Ridge Physical Therapy Facebook page.

Strength Training for Runners, Part 2: Why?

Why strength and plyometric train?

Why not strength and plyometric train? That’s a better question. My personal excuse is that it’s not as fun as running, partly because it’s not done outside and nowhere near the woods. I’d rather move me, not a dumbbell. Although I’m sure some would say by moving myself I am indeed moving a dumbbell. *Sigh*

For myself and many other runners, strengthening is a necessity if you want to run long, hard, or into old age. I will gladly give up 3-6 junk miles every week to take the time for this type of cross training. Strength training gets me to a point that makes the other runs more enjoyable. How does it improve my running enjoyment? Largely because I stay less injured overall, my back doesn’t hurt during long runs anymore, I recover quicker, and my legs never get that completely destroyed feeling in long races that they once did.

I would argue that running itself is a series of plyometrics. (The Merriam-Webster definition of a plyometric activity is “exercise involving repeated rapid stretching and contracting of muscles”). Plyometrics are just high speed strengthening.

Here are a few reasons runners should consider strength training:

1. Strength training improves performance. Every runner can benefit from strength training. Competitive trail runners, marathoners, and speed demons who compete at any distance could reap very significant gains. At the same time, the less competitive folks running just for fun could benefit too.

The mechanisms of improved performance can be attributed to any one or a combination of the following factors:

  • Increased hip and core stability
  • Increased force production of the muscle fibers (aka strength)
  • Increased fatigue resistance of the larger leg muscle groups (aka endurance)
  • Increased endurance of the core, hip, and leg muscle groups while producing greater force (aka strength endurance)

Increased hip and core stability

Having a strong core and hips takes unnecessary trunk motions out of the equation. You can then move the arms and legs more quickly and with greater force without disrupting the stable base. I noticed this in the 2016 women’s 10,000 meter U.S. Olympic trials. Molly Huddle maintains a very stable trunk posture. As a result, there is less energy wasted during the early and middle part of the run and that energy can be put to use in the closing laps. And at that point many of the competitors are flailing anyway.


Increased force production

As far as the prime movers of the legs go, if you want to move faster while running, your options are to:

  • increase turnover while maintaining the same muscle force output,
  • increase force from the muscles while maintaining the same turnover, or
  • increase both muscle force and rate of turnover.

Strength (and plyometric) training is a great way to teach your larger leg muscles to generate that force in an efficient manner. Many of the changes that we would refer to as increased strength are actually the result of the nervous system’s ability to refine how the muscle fibers fire. It’s definitely not all about making the muscles bigger. By increasing the ease and efficiency of force production, you can become faster.

Increased fatigue resistance of the larger leg muscle groups and increased endurance of the core, hip, and leg muscle groups while producing greater force

Greater total muscle strength can lead to greater strength endurance capacity. Strength endurance is concerned with the ability to generate a certain force for a prolonged period. In other words, after strength training for a few weeks I can make a muscle produce the same or greater force for a longer period of time before it begins to fail. This is a huge benefit if you have reached the limits of what your fast-twitch muscle fibers are willing to perform with standard running interval training techniques.

Racing and hard efforts can rely heavily on the fast-twitch muscle fibers, and slow endurance training does very little to train these muscle fibers because slow training is primarily using slow-twitch muscle fibers. You can only perform so much high intensity interval work while running so strength training is another way to stimulate these muscle fibers. By regularly training the fast-twitch muscle fibers, you can improve movement economy and improve fatigue tolerance. Better fast-twitch muscle fiber use will help you when bridging a gap in a race, moving at faster speeds, and climbing hills.

2. Strength training can help you prevent injury. There is research citing decreased injury incidence in athletes with consistent strength training routines (http://bjsm.bmj.com/content/early/2013/10/07/bjsports-2013-092538.abstract). Stretching, on the other hand, has no consistent research support in injury prevention. For one, as mentioned, proper strength training helps to increase hip and core stability so that the legs and arms are moving on a stable base. My theory would be that it’s mostly the strength, stability, and muscular endurance of the hips and core that help to keep a runner away from injury though it's certainly important to train the rest of the leg as well. This is where many runners have the wrong idea of what strengthening should really be about. The primary objective is to take the unnecessary motion out of the system in order to reduce the injury causing “slop.”

3. Strength training can help you recover from injury. Often, strengthening of specific muscles is a vital component of any patient’s injury recovery in my clinic. In the case of both injured and uninjured tissues, the intention is to rely on these primary concepts:

  • Improved structural integrity of muscle, tendon, ligament, and bone, and
  • Improved strength and neurological activity in weak muscles

4. Strength training changes your perspective on higher training intensities. If you can perform enough repetitions with a high resistance that you reach a point of true muscle failure, you begin to understand what it’s like to really push that extra bit of effort from yourself. That can make a finish line sprint or track workout feel a little easier, for the muscles at least.

5. Strength training helps decrease age-related strength loss. Aging causes a loss of the fast-twitch types of muscles fibers and their associated nerves. Frequently demanding work from those muscle fibers slows the rate of loss. Nobody wants to lose the strength necessary to do daily tasks but I assure you that it will happen if you let it. I didn’t think about this until I started approaching 40 years of age (and the girls stopped whistling at me.)

6. Increasing strength makes you a generally healthier individual and a well-rounded athlete. There’s nothing better than being able to confidently lift a 50-pound bag of potting soil from the ground without fear of hurting your back. And being able to randomly and confidently play a pickup game of {insert any sport here} is pretty awesome too.

7. Variety and changes in your training program prevent burnout and staleness. The same old, same old becomes dull and demotivating for most people. There is so much variety possible with strength and plyometric training that it can really freshen up your outlook.

8. Strength training can boost you through a performance plateau. The repetition associated with some endurance training programs will inevitably lead to a plateau in many athletes. In order to bust through the plateau you need a new type of training stimulus. Resistance training can be that stimulus if delivered correctly over a 4-8 week period of time, especially if you add the plyometrics and change up your running interval program.

Please let me know if you have any questions by emailing me at derek@mountainridgept.com.


Strength Training for Runners, Part 1: Myths

Middle and long distance runners have a long history of neglecting proper strength training, partly because they don’t enjoy it as much as running and partly because of the myths surrounding the concept. Those myths need to be broken.

Myth #1: Strength training will make my muscles bigger and then I'll be heavier.

You will not automatically gain weight and become huge because you start strength training. In the strength training world this increase of muscle size is referred to as “hypertrophy.” Many runners don’t want to gain size because that’s extra weight to carry in every step. The reality is your body will best adapt to the stresses you place on it most often. If you run once per week but lift weights on 3-4 days then yes, you might bulk up. But if you run 3-4 days each week and strength train during just one day then you aren’t going to add muscle mass. Age, sex, and genetics each play a role in gaining muscle size as well. And the type of strengthening stimulus matters. Larger muscle size tends to come from an emphasis on multiple sets of an exercise using a weight that is 50-75% of your one repetition maximum.


Myth #2: Strength training requires weight equipment.

Fortunately, resistance training does not always require equipment. It is possible to use your bodyweight to provide a decent stimulus for many of your muscle groups. For instance, it is critical to emphasize hip strength and core stability in any runner’s program. This type of strengthening requires nothing more than challenging positions that start with a basic plank. Advancements of difficulty can be made by isolating the muscles you are trying to work, working only one side of the body at a time, or adding stability challenges (i.e. balance).


Myth #3: Strength training requires special machines.

It definitely does not require special machines. In fact, I am a huge proponent of avoiding machines altogether. Machines are inferior to free weights in so many ways. They do not challenge the parts of your nervous system that monitor your body’s stability and positional awareness. Machines also restrict your range of movements. Freeweights can moved through any available range. And for those that like to workout at home, free weights can be cheaper and take up less space than machines.


Myth #4: Strength training means I have to workout inside a gym.

Strength work doesn’t always have to involve an indoor gym. For running, steep hill repeats with an intentionally slow, bounding cadence can engage a large number of fast-twitch muscle fibers in the hips and legs. It’s those fast-twitch muscle fibers that can improve your sprint speed, surge speed, and overall pace in races like a 5K. The scenario is the same with plyometric training as you don’t need equipment or a special location to bust out a few quick jumps or hops.


Myth #5: Strength training will slow me down.

If done correctly, strength work will not slow you down and actually has the potential to make you faster. In one recent study, even when very heavy amounts of weight were used (3-4 sets of 4-10 repetitions to failure), female runners maintained their race speeds after 11 weeks of training. (http://www.ncbi.nlm.nih.gov/pmc/articles/PMC4783109/) In application, I would never expect a competitive or recreational runner to train with that heavy of a resistance for such a tremendous amount of time. However, it is good to know that even after several weeks of heavy weight training these women sustained their speed. I would expect runners of any ability level to spend their time performing supplemental work to gain hip and core stability and fatigue resistance of their primary movers (hamstrings, quadriceps, calf group).


Myth #6: I won’t gain anything from strength training only one or two days a week.

As little as one day per week is sufficient to have a positive impact on strength and strength endurance. Some athletes think that strength training has to occur at a high frequency to result in a change. That’s simply not true. Working hard on your weakest areas just one to two days each week can have a tremendous impact. If those muscles were minimally challenged beforehand, then any stimulus greater than their normal level of activity is going to cause a positive change. Even if you prevented just one injury, it would be worth the extra effort of as little as 30 minutes each week. 


Next week I’ll dive into the benefits of adding strength training to your running program. In the meantime, if you have any questions, email me at derek@mountainridgept.com.

Knee pain at the iliotibial band: What can you do about it?

Description: Iliotibial band syndrome, or ITBS, is one of the more common injuries affecting runners. And why is that? Probably because the same faulty motor patterns and muscle weaknesses tend to run rampant amongst many runners. ITBS tends to come on gradually, causing a lateral knee pain, though some runners are able to bring on the pain in a single run of greater distance or intensity than their typical. It is often another story of too much, too fast.

Anatomy: The muscles that attach to the ITB are from the hip and thigh region: gluteus maximus, vastus lateralis and tensor fascia latae. The far end of the ITB splits into several sections, which indicates it has a role in the function of many areas. Most commonly athletes will complain of pain where the ITB interacts closely with the lateral femoral condyle.

Cause: The primary function of the ITB is to stabilize the knee during walking and running gait. When some of the hip muscles are weak, the ITB can be relied upon too heavily for knee stability, thus stressing its lower attachment excessively.

Signs and symptoms: The far end of the ITB can flare up like a tendonitis does when initially becoming inflamed. There can be inflammation at the bursa that sits beneath the ITB as well. As a result, you might notice swelling and tenderness to touch at the outer knee where the ITB crosses. There can be a snapping or popping sensation at the lateral knee. The pain tends to take on a sharp and stabbing quality when there is demand placed on the leg but the general area may be achy after use. 

A common finding in many instances of ITB syndrome is hip muscle weakness, particularly of the gluteus medius and gluteus maximus muscles. There may be a decreased ability of the nervous system to activate and control those hip muscles while running, even if they are strong in testing.

An indicator of poor gluteus medius activation is an excessive dropping of the opposite side of the pelvis when the affected leg is in stance. One way you can check this is to stand in front of a mirror, hands on your hips, and then shifting yourself onto one leg. For instance, if you move onto the left leg and the right side of the pelvis clearly drops then you have a positive Trendelenburg's sign. Check both sides as it is common to have an asymmetry. In the video below I demonstrate both the active position and inactive position. The same excess of pelvic motion can occur in walking and running. 

Solutions: As with many of these injuries, there is no magic pill and no quick fix. Consistent but brief supplemental work is the reliable solution.

1. Some physicians may promote injecting the bursa region that lies between the femur and the end of the ITB. Corticosteroid injection should be a last resort as recurrence is very likely if the mechanical control of the hip and knee are not addressed. I have had patients where injection was used as a first line treatment. Guess what? The pain came back. At least this is a lower risk area to inject with corticosteroid as the risk of ITB rupture is minimal compared to an area like the Achilles tendon or posterior tibialis tendon. The side of the quadriceps is probably more likely to rupture. Remember, injections do not address the mechanical reasons the injury occurred in the first place.

2. The very first and simplest issue to address is the presence of any weak muscles at the lateral side and back of the hip. These muscles need to be activated easily and consistently by the nervous system. So many people have weak muscles around their hips, trunk, and pelvis so don't assume you are an exception. It is a daily occurrence for me to see these issues in the clinic. 

Athletes need a baseline level of strength and the ability to effectively recruit these muscles while running to prevent the pelvis and hips from destabilizing. Poor strength or activation may allow the thigh to collapse inward or rotate inward along with an unleveling of the pelvis. It’s also important to consider the endurance of these muscles because the strength will undoubtedly be decreased a few miles into a run or fatiguing workout.

As a side note, I have seen so many patients that were correctly told to perform exercises like a side lying straight leg raise only to discover they are doing it in a manner that works the wrong muscles because no one checked their technique. Their form was incorrect and doing these exercises incorrectly can actually contribute to the problem. Not only are the wrong muscles used (eg. tensor fascia latae), they are creating a dominance in areas that further inhibit the function of the correct muscles (eg. gluteus maximus).

Here's the routine that I do on a weekly basis. 

3. As the awareness, endurance, and strength are all starting to increase, it is necessary to challenge the nervous system’s ability to stabilize the hips and pelvis. Single leg balancing activities are a great program component to do this. The individual must recognize where the pelvis achieves a stable position in order for this to be effective. This can progress to single leg hopping and jumping activities while keeping the pelvis stable.

4. There has been some controversy over whether athletes should foam roll their ITB, which I discussed previously here. Don’t bother trying to stretch your ITB unless you like to waste time and potentially worsen the problem. Most ITB stretches simply stretch the hip muscles that are already weak, which is absolutely counterproductive. And the ITB’s connective tissue is extraordinarily strong so you aren’t going to stretch it.

image courtesy 220triathlon.com

5. Running technique changes can be effective to normalize demands on the hip muscles and move in a less painful range of motion. The knee needs to maintain a high level of bend during swing. If you have a tendency to overstride far forward of the body’s center of mass then you will place greater demand on the gluteus medius muscle as soon as the foot makes contact, setting yourself up for failure. You may only need to increase your cadence 4-6 steps per minute and think of nothing else. There’s more information on cadence changes in my shin splint article here. The relationship of the ITB to the femur bone beneath it also changes as the knee is bent and straightened so changing the technique can change that relationship. In some runners there can be a benefit to running quickly for 20-30 seconds and then walking to vary the mechanical position of the ITB to the femur.

Poor right hip abductor engagement

6. If you have been unable to exercise secondary to ITB pain, make sure you take full recovery days between the days that you do start to exercise. These off days are great to emphasize the strengthening, balance, maintenance, and so on. For running that first time back, short and consistent is the name of the game. Better to run one mile each on three or four days than three to four miles at once. Depending on the number of days you have taken off, a mile isn’t an unreasonable distance to start at and that may also require a walk/run program. 

Please let me know if you have any questions at derek@mountainridgept.com. 

Highlands Sky 40 Mile Trail Run: Best Race for Anyone with Achy Feet

Super tame section of Canaan singletrack

The neverending boulder fields, rock-strewn trails, endless bogs, and cold stream crossings will provide your feet with the nice, soothing care that they deserve. I wish I lived closer to the course so I could run it after work on days when my feet are a little achy.

Seriously though, this is a brutal course, at least through the beginning miles. For those of you unfamiliar with the event, the point-to-point course traverses the Canaan Valley and Dolly Sods areas in the Monongahela National Forest.

Despite doing my homework by asking prior competitors about the terrain, stalking Strava segments, and searching YouTube, I could have known so much more about the course. There is no substitute for experience and having never done the event it’s hard to know what to expect. But that’s also part of what makes the challenge more exciting.

Pre-race

The pre-race dinner at Canaan Valley Resort was great. There was a nice variety of carb-heavy food and local craft beer from Mountain State Brewing. Several high quality door prizes were given away. I won coffee from Sweet Bloom Coffee Roasters and as of this morning I've decided it's the best coffee I've ever made at home. 

Most racers stay at the resort but I ended up staying at the Timberline Ski Resort, which I would see around mile 35 in the following day’s run. I awoke at 4:00 AM and began the typical race morning preparation with the special hotel rendition of my classic breakfast sandwich: 1 everything bagel, 4 slices of bacon, and 1 egg. After a banana for dessert I was on my way out the door.

Bacon makes you faster not fatter

Start

My wife and I drove down to the starting area in Laneville, WV, arriving around 5:30 AM. It was a little chilly for standing (because I’m a wuss), but perfect for running. The forecast was calling for very nice sunny and slightly warmer weather. Wish I could duplicate that for every race. I’d heard rumors that the top competitors started out hard and fast to avoid a bottleneck at the trailhead. That was definitely true, as I was running around 7 minutes per mile on the paved road until we hit the trail around mile two and there were runners in front of me going even faster.

Almost go time

We then began the long ascent from Laneville, WV up the mountain toward the Dolly Sods area. We made our way through multiple mountain stream crossings and large, unforgiving patches of stinging nettles. A pack of five guys formed in front of me going up that 6-mile climb, and the current leader was well off of the front. The pack of five eventually became a pack of three, as two dropped off behind me. I had to make the decision early to let them run away from me as I was pushing my heart rate well into heart rate zone 5 and I don’t even do that in the early miles of a road marathon!

Frolic in the ferns

After getting to aid station #2 one runner caught me and I dug deep to stay near to him as we descended into another large ravine. It’s not always the climbs that are hard on your legs. If it hadn’t hurt me so much I would have liked that descent more because it was laden with ferns.

Entering Dolly Sods

I did eventually catch that group and was able to stay in front of them for the entirety of the race. But in my efforts, I mistakenly pushed myself a bit too much, too early. The upper portion of the mountain became quite steep in places, enough to require use of the arms and hands to climb. I quickly learned that these were some of the most true and unforgiving mountain trails that I have ever raced. I came into the halfway point in second place, wondering how rough I was really going to feel by mile 30, knowing the early course had taken a toll. As an aside, I’m voting aid station #4 the best on the course for their high level of enthusiasm!

Multitasking food, shoes, and socks with fantastic volunteers

Friend Daniel Hanks shaving his legs at the halfway point

Road Across the Sky

Running the stretch of gravel road known as the Road Across the Sky, I could gradually feel my efforts catching up to me. It was difficult to run under 9 minutes per mile on a section where I should have been able to do 8 minutes easily. As a result, two runners caught me.

By the time mile 30 was approaching, I was definitely depleted more than I expected. Nothing like making a beginner mistake. I began hiking uphill sections where I would normally run.  

Those couple miles up to mile 33 were not fun, as the terrain was exposed to full sun and at over 5 hours into the event I was becoming emotionally and physically drained and that allowed yet another runner to catch me. Very demotivating. He was doing what I usually strive to do: negative split!

I felt like my nutritional intake was lagging behind and that contributed to my suffering. Speaking of nutrition, here’s what I ate and drank during the race:

  • 4 Gu gels
  • 1 peanut butter and jelly sandwich
  • 2.5 bananas, 2.5 liters of water
  • 3 oz. pickle juice, 3 dill pickle spears
  • 6 Oreo cookies
  • handful of plain M & Ms
  • handful of trail mix
  • 2 salted boiled potato slices
  • 12 oz. Coca Cola

Stupid knee

At mile 33 I started to have right lateral knee pain. I briefly forgot about it at aid station #7, but when I took off running again it reminded me of its presence less than 100 yards from the aid station. The intensity grew rapidly and substantially. I couldn’t even walk without pain and I was forced to limp. That was incredibly discouraging. I began to mentally prepare to walk the final 7 miles of the event, hoping to somehow hang on for a top 10 finish.

Butt Slide

But I actually didn’t have to walk that much as I began descending from the ridge. My inner Physical Therapist kicked in and told me to look for the fatigue-related running pattern changes. I noticed that I was disengaging my right quadriceps and allow my right knee to snap backward a little. The muscle just wanted to be lazy. And I know I have a history of landing with my right foot closer to centerline (i.e., crossing inward). I realized that if I just ran with the knee slightly more flexed and with a wider stance, the pain began to consistently subside.

All of my consistent strength training paid off because I had reliable quads on the steep downhill section affectionately known as “Butt Slide.” However, just out of the fear of pain returning I remained timid on the downhills and technical sections through mile 35. At one point the trail became less obvious I was wandering aimlessly for about a minute on that hillside. Trusting my directional instinct fortunately brought me back to the red flags on trail.

Road Race

I had recovered very well from the 2 miles of easier running. The flat gravel and paved road from that point on gave me hope that I could run quickly without tweaking my knee. As I approached the final aid station I could see one of the runners who had passed me on the Road Across the Sky. I downed 2 cups of Coca-Cola at aid station #8 and took off with a new motivation. It became a road race from mile 37 to 40. I managed to move up a place at the start of mile 38.

Finish

I ultimately finished up 4th overall, which makes me happy having never raced there before. That was definitely slower than where I wanted to be but the reasons were very clear to me. That course is a true challenge and quite beautiful. It would be great to run parts of it again while taking more time to stop and appreciate the surroundings. When trying to run hard there is so much time spent staring at the ground, hoping not to fall or twist an ankle. I will be back. 

Happy to be done and excited to have run the final 7 miles

Thanks

Special thanks to Dan Lehman, Adam Casseday and the rest of the WV Mountain Trail Runners crew for putting on such an awesome event, really caring about the racers, and giving out some cool prizes. And a big thanks to my wife for driving my tired butt home and crewing for me. And thanks to Pearl Izumi for the sponsorship this season. 

Should you exercise while taking antibiotics?

Did you know that there are some prescription drugs that can have a negative impact on exercise capacity, recovery, and injury?

As if most of us didn’t already dislike taking antibiotics, now you might want to think about the documented exercise-related side effects from a specific family of antibiotics known as fluoroquinolones. These drugs have been associated with a risk of tendon rupture and tendon overuse injury.

Fluoroquinolones are frequently used to treat sinus infections, bronchial infections, and urinary tract infections, and work well against a large variety of bacteria. Which means many of us have taken these drugs.

Examples of these drugs include:

  • Levaquin (levofloxacin)

  • Cipro (ciprofloxacin)

  • Avelox (moxifloxacin)

  • Floxin (ofloxacin)

  • Factive (gemifloxacin)

Despite the consistently positive effects, in May 2016 the FDA made this statement available: “An FDA safety review has shown that fluoroquinolones are associated with disabling and potentially permanent, serious side effects that can occur together.  These side effects can involve the tendons, muscles, joints, nerves and central nervous system. As a result, the FDA is also requiring label changes for all systemic fluoroquinolone antibacterial drugs to reflect this new safety information.”

The FDA is not suggesting that doctors should stop prescribing these drugs. They are suggesting that they should not always be the first line treatment.

These side effects have been researched since 1996 (and one source documented tendon damage from the use of one of these drugs in 1983). Often the individuals begin to have tendinitis-like symptoms that quickly progresses to partial or full tearing of the involved tendons. Achilles tendon damage has been particularly well documented with tendinitis and ruptures.

Does this mean you will definitely have a torn tendon after taking these antibiotics? No. But as an individual with a more active lifestyle that heavily stresses your connective tissues, you should be aware and concerned if you begin to have tendon pain while taking or shortly after taking a course of these drugs.

Before taking these drugs, you may want to discuss the need for that particular prescription with your doctor, as you might qualify for another option. Should you begin taking these antibiotics while having an already existing tendon injury, be extra cautious with your activity for at least a month (negative effects have reported up to three months later). If you begin to have tendon pain while taking them, get in touch with your prescribing physician.

Having seen many patients who underwent surgical tendon repair procedures, a tendon rupture is not an injury that you want to deal with if it can be avoided. The likelihood of rupture is rare with 15-20 cases per 100,000 drug uses. If you must use that specific family of drugs be sure to monitor yourself, cut back on your exercise routine and talk to your physician if you should start to develop tendon region symptoms.

The information provided here is for informational purposes only. If you are concerned with your antibiotic use, seek further guidance from your primary care medical professional. 

Geek out:

  • http://www.fda.gov/Drugs/DrugSafety/InformationbyDrugClass/ucm500325.htm

  • http://www.runnersworld.com/injury-treatment/fda-warns-of-tendon-damage-linked-to-antibiotics

  • http://www.medscape.com/viewarticle/410546_3

  • http://www.ncbi.nlm.nih.gov/pubmed/15777120

  • http://www.ncbi.nlm.nih.gov/pubmed/12587511

  • http://www.ncbi.nlm.nih.gov/pubmed/8863030

  • http://www.ncbi.nlm.nih.gov/pubmed/8832995

  • http://www.ncbi.nlm.nih.gov/pubmed/11409663

  • http://www.ncbi.nlm.nih.gov/pubmed/21686678

6 Deckers Creek Trail Half-Marathon Recovery Tips

Hope you had fun in the race. That last mile is brutal, right? Here are a few considerations to improve your recovery.

  1. Active recovery. At a minimum, go for a short walk. It can be slow and relaxed. If you are more experienced, going for a short run isn’t out of the question, of course. Going for a swim is a great choice too. Anyone with at least a couple months of training under their belt will feel better having performed active recovery - if it’s done correctly. It will take at least 10 minutes of activity to get to that point though.
  2. Avoid anti-inflammatory drugs. Inflammation gets a bad reputation because it’s usually accompanied by discomfort. But you need those processes to heal properly! Let your body do what it is meant to do in recovering from muscle soreness. Besides, over-the-counter anti-inflammatories are actually not very effective at improving the discomfort associated with delayed onset muscle soreness.
  3. Ice anything that seems like a new injury. Yes, inflammation has a good side. But a true new injury (besides muscle soreness) can have a little too much of that inflammation. Ice is nice to be able to spot treat anything that has flared up without having the systemic effects of medication. Ice now so these areas are not still an issue in three days.
  4. Regain normal hydration levels. It was hot and humid, so there is no doubt that you lost more fluid than you took in. Your urine shouldn’t be dark in color. It should be more like the color of a light beer. Drink 6-8 ounces of plain water every hour until you have achieved that level of hydration. If you have gastrointestinal discomfort at this point, then there’s a really high chance that your hydration levels are off.
  5. Gently perform muscle self-massage. Use a foam roller, massage stick, tennis ball, lacrosse ball, or even a rolling pin from your kitchen to roll up and down the full length of the thighs and lower legs. It doesn’t have to be highly uncomfortable but a little tenderness is fine. Try for 30 strokes on every side.
  6. Take a nap. Sleep is a great recovery method. The weather stinks today anyway. If you feel fatigued or drained then take advantage of a quick nap to boost your endocrine system’s output of healing hormones.

4 bits of advice for running Deckers Creek Trail Half-Marathon

Share these with your running friends doing the race, especially the first-timers and out-of towners that haven’t experienced the glorious hills.

1. When in doubt, eat! The half-marathon distance lulls people into thinking they can complete it without a little fueling. It’s not about assuming you don’t have enough stored energy to get it done. I’m sure you do have the energy stores to finish. But don’t you want to finish strong? It’s about subtly tricking your body into thinking that calories are coming into the system. You will feel better during and after plus your recovery time is decreased if you eat during the race. Personally, I usually have half a banana at mile 5-6 but that’s what works for me and it might not work for you.

2. Don’t underestimate the last 2 miles of the course. You will be slapped in the face with multiple obstacles all at once. Best to expect and prepare mentally for them.

  • The course abruptly switches to pavement from compacted sand and pea gravel so your steps feel more harsh.

  • There is suddenly little to no elevation drop, which will force you to slow your pace and change your technique.

  • The temperature is much warmer because of the elevation loss up to that point, it’s later in the day, and there are no trees for shade.

  • Plus, you just ran 11 miles, all downhill, so your quads are already not happy. Did someone say heavy legs?

3. Keep your turnover slightly quicker than usual to avoid killing your quads (as badly) before those final 3 miles. With the constant descent, your tendency will be to overstride, which will definitely demand more of the quads with each step.

4. Conserve effort in the first two to three miles. In most races, you don’t want to start out too hard in the first mile. In this race, the grade pitches rapidly toward 2% at the end of mile one and can get you running far faster than usual. As a result, you don’t feel the higher effort in the earliest miles that you normally would expect. Your heart rate is going to take longer to come up than on a flat course so that’s not a good indicator. Being downhill, the first 10 miles create more of a muscular demand than the average half-marathon while being less stressful to the cardiovascular system than usual. Check your splits at mile 2 and 3 and then adjust accordingly. I doubt many people will come through the 5K split and say “that was too slow.”

5. Bonus: Watch out for the cicadas. Especially if you are faster than me, I suggest wearing safety goggles and knight armor.

Does foot pronation increase risk of injury?

There is a misconception that certain structural features of the body are directly related to injuries. For years, people with lower arches were referred to as “pronators” and those with even flatter feet were “overpronators” or “hyperpronators.” They were all thought to have more injuries, and a portion of the shoe industry has really kept that mentality alive. The other two general foot types, neutral and supinated, were the supposed ideal.

Image Courtesy http://www.mikevarneyphysio.co.uk/wp-content/uploads/foot_pronation_supination.png

If you watched the pronator group walk, they might not appear to maintain their arch height very well. But is that always a problem? In the people labeled as pronators there are often joint structure differences that allow more inward collapse of the ankle and foot. In the supinator group there are joint differences that would keep the ankle and foot raised upward. Regardless of foot type, some level of pronation is a normal movement because it allows for shock absorption as the leg is loaded. A certain amount of supination is also normal because it allows for a rigid push off.

We begin our childhood with a lower inner arch height, largely due to a lack of bony structure, and this results in a pliable foot. With normal growth, as the foot bones develop, the inner arch tends to rise and the bones of the leg also change their orientation a bit. In some people the arch really doesn’t increase its height much with growth. And even if it does, in adulthood there can be contributing changes that would affect foot and ankle position:

  • degenerative or use dependent joint changes at front of the foot, the middle of the foot, or the rear of the foot  

  • lower leg muscle shortening

  • weak, inhibited, or injured lower leg muscles or tendons (commonly the posterior tibialis)

  • general hypermobility throughout many of the body’s joints

  • tibia and femur bone structure (twisting, length discrepancy)

The concern is that these changes are also able to affect the movement of the knee, the hip and then even the pelvis and back. We all have a certain acceptable range of motion within each of these areas. If the changes in the foot allow the knee or hip to operate just on the edge of their tolerated position of use then, conceivably, you might have an increase in risk for knee or hip injury.

In actuality, foot structure may be more related to the type of injuries acquired than frequency of injury.

  • According to a 2001 research article in Clinical Biomechanics, higher arched runners developed injuries most often on the lateral side of the leg and had more ankle and bony injuries. Their lower arched counterparts had more knee and medial lower leg injuries.

  • A 2005 research article in the Journal of the American Podiatric Medical Association indicated that triathletes with a more rigid, high arch were at a higher risk of injury compared to neutral and pronated foot types.

  • More recently, in 2014, a meta-analysis in the Journal of Ankle and Foot Research indicated a very slight increase in risk of overall injury rate with the more pronated foot type being related to increased risk of kneecap pain and medial tibial stress syndrome (a.k.a. one of the types of shin splints.)

As you can see, the research is conflicting. The rate of injury is similar between athletes with all foot types. Perhaps we would have different results if we broke the common groups (pronator, neutral, supinator) down into subgroups based upon strike patterns (heel, midfoot, forefoot) to account for variations in demand.

My concern is that many of these studies assess the foot arch height while standing still. Unfortunately, this does not mimic how you use the foot in activity. Someone with a pronated foot structure while standing may not even touch their heel to the ground with running. Is it really going to be effective to put them in a motion control or stability shoe designed with a heel striker in mind?

A 2009 study by J. Dicharry demonstrated that while running the total motion of the navicular bone in the arch isn’t drastically different regardless of foot type. They called the pronators the hypermobile group in this case. Even if the arch of a pronated foot is at a lower position in standing, it’s total amount of motion is only slightly increased from a neutral or supinated foot while running. Neutral and supinated feet were 0.3 mm different between walking and running. Pronated feet were 1.2 mm different from walk to run. 

Should you be concerned with such minor differences and trying to use external devices like shoes to accommodate for them? The first step is to determine whether the pronation that is occurring is structural or a compensation. If forced to compensate, as in the case of decreased calf muscle length, you may need to focus on increasing mobility where it has been lost, like at the ankle joint, by elongating the calf muscles. Forcing mobility where it has already reached an excessive level in the midfoot by neglecting the calf length is not going to be helpful.

Our bodies are very good at adapting to gradually applied stresses, so a person with a more flexible, lower arch should be able to safely progress their activity just like anyone else. The research would suggest addressing the tissues that are the most likely to be injured with each foot type.

For instance, someone with a higher arch could focus on single leg balance and strengthening of the outer lower leg muscles. Those with a lower arch could focus on increasing strength of the inner lower leg muscles. I suggest we should focus on keeping both sides of the lower leg as strong as possible without one side becoming more dominant.

An often overlooked factor is inner foot muscle strength. Several of those muscles are meant to stabilize the arches of the foot, so it would be no surprise to me that decreased inner arch height can be associated with decreased muscle strength. But it’s not always a 1:1 relationship. Little research exists on this because it’s difficult to measure intrinsic foot muscle strength. Look for my blog article on intrinsic foot muscle strengthening soon.

Final thoughts:

  • Progress running intensity and duration in a safe manner using the 10% rule.

  • Keep the calf muscles loose to prevent ankle motion loss with a combination of rolling, massage, dry needling, and maybe stretching.

  • Strengthen the muscles that take the ankle and foot in all directions.

  • Strengthen the intrinsic foot muscles.

  • A pronated foot type does not necessarily require a bulky, stiff shoe and orthotics.

  • A pronated foot type is not going to be an immediate cause of injury, there are other factors to consider.

  • Don’t spend too much time worrying about your foot type because anatomical variation is normal.

  • Let your feet work how they were intended.

Geek out:

http://www.ncbi.nlm.nih.gov/pubmed/19648718

http://www.japmaonline.org/doi/abs/10.7547/0950235

http://www.clinbiomech.com/article/S0268-0033(01)00005-5/pdf

http://jfootankleres.biomedcentral.com/articles/10.1186/s13047-014-0055-4

http://journals.lww.com/cjsportsmed/Abstract/2001/01000/The_Role_of_Impact_Forces_and_Foot_Pronation__A.2.aspx


Please let me know if you have any questions at derek@mountainridgept.com and feel free to share this article via the share button below.

7 Keys to Managing the Discomfort of Exercise

It’s understood that moving quickly and for long periods can be downright uncomfortable. We always have the option to control the situation by either stopping or slowing down. But you also have the option to see if that pain can be managed with other mechanisms so that you don’t have to stop or slow.

Exertion discomfort is a term that describes the typical discomfort associated with performing exercise at a higher intensity. Most athletes, competitive and non-competitive, have encountered this discomfort at one point or another. Some athletes may find it addictive and thrive on that sensation of pushing themselves. Other athletes struggle with tolerating exercise-related pain.

Depending on an athlete’s training level, terrain, intensity, and technique, they could experience general exertion discomfort in a variety of locations throughout the body. General exertion discomfort:

  • Stops after 30-45 seconds of rest.

  • Tends to be present in the muscles that are working hardest.

  • May also occur throughout the chest or cause a “whole body” experience.

  • Occurs predictably with a certain speed of movement, specific effort, or number of repetitions.

Experience will be a significant part of determining the type and level of exertion-related pain any athlete can tolerate. Experienced athletes have often learned a few tricks in managing that pain, as it is an expected and predictable occurrence. Newer athletes often haven’t yet learned the skills needed to manage the discomfort. Regardless of experience, some athletes are simply able to mentally cope with this discomfort better than others.

Here are six tips to help improve exertion discomfort tolerance.

Do a body scan. A body scan is a head-to-toe self-assessment that you perform while moving to determine if you are staying relaxed and maintaining the technique that you need to maintain. Remember that song “Head, shoulders, knees and toes?” The writer must have been a runner. A specific area of discomfort can be a clue that you need to focus in on an area and make an adjustment. For instance, if I feel a little discomfort in my shoulder blade region I might ask myself a couple questions: “Are my arms swinging nearly straight forward and backward and equal amounts?” Or “Am I rounding one shoulder forward more than the other?” The answers are often able to pinpoint the problem and then I adjust my technique to correct it and the discomfort subsides.

Take a deep, cleansing breath. This can force you to vary your breathing pattern but also works well to fully expand your lungs, expel any buildup of CO2 and let you relax your shoulder and neck muscles, where many of us carry tension. It’s a good reminder to breathe deep toward the stomach and not depend on the assistive muscles. I’ll often perform this deep breathing after doing a body scan because I have a tendency to tense at my shoulders and neck.

Vary your technique to place the demand elsewhere. One place of common discomfort is the leg muscles. Another common area is more focused at the chest and lungs. If a runner is taking longer strides then this will tend to fatigue the thigh muscles, particularly when climbing. If that thigh pain is getting out of hand then you want to tighten up your strides to quicken the turnover. After performing that change for 30-60 seconds, you may notice that your chest and lungs are now the bigger problem. Likewise, a burning fatigue at the chest can be decreased with a switch to intentionally longer strides to load the muscles more while giving the respiratory system a slight change.

Get your mind right. Positive mindset is a large part of the solution when dealing with exertion-related discomfort. If you know what to expect because you have prepared well, then you are far less likely to get caught up in the negativity that can come as you tire. In training, you must be willing to meet a point of discomfort so that it is familiar to you during competition.

Use a mantra. Or anything that you can repeatedly go over for periods of time in order to improve your technique or provide a distraction. It could be something like “quick and light” or “pick ‘em up, put ‘em down.”

Check your eating. If you haven’t taken in a sufficient number of calories, your psychological state will suffer. Our brains rely heavily on a certain level of blood sugar. As the blood sugar level drops you will tend to have greater negative emotional responses. And no one is going to perform at their best with continually negative self-talk. 

Use other effort indicators. One of my favorite indicators, especially in a long event, is heart rate. I know from prior experience what range of heart rate I can tolerate for a given time. Going above the expected range is taking a known risk. Another indicator can be pace, which is more variable if the terrain fluctuates. These indicators can provide a more objective measure of effort before you get to the point of discomfort. The goal is to hone in on and remain controlled within the performance range that allows you to achieve the most success. It takes the guesswork out of relying only on feel. 

And in case you aren’t sure yet of how hard to push yourself in exercise, consider that there are certain types of pain that are unexpected and not to be ignored. Muscle, joint, or bone pain caused by an injury could be recognized by any one of or a combination of these factors:

  • Located at a single side of the body. For example, just one leg or arm.

  • Specific to a smaller area, particularly at a joint.

  • Started after a specific injury, like rolling an ankle or twisting a knee.

  • Doesn’t subside within about 45 seconds of stopping activity.

  • Intensity might actually worsen at rest.

  • Is unfamiliar in location and intensity.

  • Intensity of pain doesn’t correlate with intensity of effort.

  • Often described as sharp or severe.

I can be reached at derek@mountainridgept.com if you have any questions. 

Training errors in the athlete, part 6

Too much, too soon, particularly after an injury. Most athletes understand that progressing too quickly in their regular training can cause injury. What they don’t often understand is how to return to sport after an injury. This is the easiest time to go too hard or too long. You can have the “I’m all better” concept down too well.

Injured or not, the body is only capable of adapting at a certain rate. Some tissues can adapt in a few days (cardiovascular system, nervous system pathways), some in a few weeks (muscles), and others in a couple months (tendon, bone). Depending on the location of the injury you must consider what are known as “tissue healing constraints.” For example, a tendon overuse injury can take 1-3 months to resolve with correct progression. A low-grade muscle strain could take 1-4 weeks.

If a runner has tendon pain from a new tendinitis that has been present for 3-4 weeks then I would expect it is going to take weeks, not days, before returning to their pre-injury mileage. It doesn’t always mean you can’t run at all during recovery. It must be a controlled progression. And there is always some type of cross training you can do.

The first day back to running should not be a 5 or 7 mile long run, regardless of terrain or intensity. And that’s what I see many people try to do when they return from injury. They want to get right back up that mountain quicker than they came down it. Stay in the valley for a couple days. For every week away from running I would expect a need for at least a 30% drop in average weekly mileage upon return.

It’s going to take at least a week of no exercise before you actually have a loss of fitness. The fitness losses from 2 weeks of inactivity are similar to those of 4 weeks. And I’m sure you have been cross training to minimize those losses. Point being, don’t rush back into it simply to regain fitness that doesn’t really need to be regained.

Not listening to your body’s warning signs of insufficient recovery. This is similar to what I mentioned last week about not respecting a specific injury early. But you also need to consider a whole body factor. Something is up when your muscles have been feeling constantly tired before, during, and after workouts. You might wake up more groggy than usual or old injuries start to reappear. You need to consider what your body is trying to tell you.

It’s normal to feel a little stiff and achy in your muscles when you start to push them. But when a slow, easy warm-up doesn’t put some pep back in your step after 20-30 minutes then there’s a good chance you could be digging yourself into a hole. If you feel good at that point, then a hard workout is reasonable. If you still feel slower than normal and better yet, are actually slower than your normal, then it’s not a day to push your effort.

For the uninjured, refrain from making any judgments about how your workout is going to proceed until your system is well warmed-up, at least 15 minutes into exercise.

Not performing regular soft tissue maintenance like foam rolling, massage, and compression in recovery, especially after the hardest and longest efforts. Repetitive wear and tear beats up your muscles. Unhealthy muscle tissue equals decreased performance and even pain. As athletes, we surely can’t expect that pushing into exercise-related discomfort multiple days per week generates only 100% positive adaptations in the muscles and other tissues. There are gradual negative adaptations too, like trigger points, adhesions, and loss of muscle tissue length.

Show those muscles a little love with self-massage. Help your lymphatic system function at its best by preventing fluids from accumulating in the spaces around your muscles and other tissues with compression. Options for compression include compression socks or for a more massage-like treatment, a pneumatic compression system, like the Normatec. Most athletes find that massage and compression simply feel good after prolonged exercise.

Let me know if you have any questions: derek@mountainridgept.com

Running technique: 3 reasons why runners develop shin splints and 7 ways to fix them

I really dislike the term "shin splints." Probably more than you dislike actually having pain from shin splints. That's because the term has been used to describe about five different problems that occur in the lower leg. It's terribly vague.

The term "shin splints" has been applied to injuries that are more specifically described as medial tibial stress syndrome, tibial stress fractures, and exertional muscle pain. Exertional muscle pain is the most common type of problem, so for the sake of this article, I will refer to the shin muscle and tendon pain from exertion as “shin splints."

One of the shin muscles is the anterior tibialis, which is the biggest muscle on the front of your shin region. It’s main function is to pull the front of your foot upward. That's called dorsiflexion (see photo). It's helped by the neighboring extensor hallucis longus (EHL) and extensor digitorum longus (EDL) muscles.

While walking and running, they keep you from catching your foot and toes on rugs, roots, stones, steps, and generally rough surfaces. We’ve all caught a toe, tripped, fallen and groaned in pain as we lie on the ground. These are the muscles you can thank for keeping you from biting it everyday.

There are several reasons why runners will develop exertional shin splints. Some of them include:

Heavy reliance on heel striking. This is the most likely reason a runner, especially a new runner, would develop shin muscle overuse pain. With a heel strike, you must increase use of the anterior tibialis muscle or your foot will slap down to the ground. Runners who heel strike demonstrate a greater dorsiflexion (pointed up) angle upon ground contact compared to a runner who lands with their entire foot flatter or on their forefoot.

In the picture below the ankle is pulling up into dorsiflexion 15 degrees above a neutral ankle position. This is in contrast to the midfoot strike images below where the foot is contacting the ground in a slightly plantarflexed (pointed down) angle. In order to lower the front of the foot to the ground from a heel striking position, the anterior tibialis muscle needs to work extra hard. All of that extra work results in a chronic state of overuse in the shin muscles and tendons, which is easy to imagine when you are asking them to perform 700 contractions per mile. 

Initial contact with heel strike pattern

Overstriding in the forward direction. Along with the heavy heel striking pattern, reaching the leg too far forward with each step will increase the stress on the shin muscles. You can use a heel strike pattern without causing shin splint pain if your foot contacts close to your center of mass. Imagine your center of mass being a line drawn straight down from the center of your hips, as in the following picture. If the foot contacts the ground 12 inches in front of the line instead of 10 inches, the demands are much different on the muscles, tendons and joints.

Most runners who shorten their stride in the forward direction start to land on their midfoot instead of their heel. Compared to the heel strike picture above, using a midfoot or forefoot strike pattern (and sometimes a slightly quicker turnover) causes the stride to be slightly shorter in the forward direction. That's evident with the lower hip flexion degree value. But it's most noticeable that the distance line to the point of contact at the bottom of the picture is clearly shorter than in the previous heel striking picture. It is possible to make an initial contact at this same closer point and use any of the three types of contact patterns. 

Initial contact with midfoot strike pattern

Short/tight calf muscles. If the muscles on the back of your lower leg are so short that you can’t take your ankle into the normal level of upward dorsiflexion motion, the shin muscles are going to need to work harder to overcome that passive resistance. One quick way to assess whether the muscles on the back of the lower leg are too short is to do a full squat. Barring any unusual knee or ankle joint and bone issues, if the feet can't stay flat on the floor, especially without turning the feet out or the arches collapsing, you may have a limitation in the length of those muscles.

Tips for correcting these issues.

1. In the cases of both heel striking and overstriding, the solution is much the same. The foot needs to land closer to your center of mass. You could simply think about taking shorter steps. You can think about it landing directly beneath you (which will never actually happen). A one-inch change in the initial contact point is going to feel like a 12-inch change but I assure you that the awkward feeling is normal at first.

2. Some runners need an external focus to prevent overstriding forward, so matching their cadence to the beat of a metronome can be helpful. Count the number of steps you take with one leg in one minute of running. Those who overstride are often taking less than 82 steps each minute. The metronome can be set for a value greater than 82 while you try to match the step rate with one leg.

3. For tight calf muscles, everyone’s first thought is “stretch.” Stretching is fine if you hold the stretch for at least 1 minute but 2-3 minutes is more effective to mechanically lengthen these tissues. And you would have to do it daily for at least a month to get much change. It can be more effective to perform soft tissue work with a foam roller, massage stick, tennis or lacrosse ball, massage therapist, or manual therapy from a Physical Therapist. Regardless, just try something! Lessons on muscle rolling here.

4. Relax the anterior tibialis muscle with consistent soft tissue maintenance. Trigger point dry needling or myofascial release can work wonders to make the muscle happy and decrease pain quickly. The massage stick can be great too. Lessons on muscle rolling here.

5. Practice engaging the anterior tibialis muscle by walking on your heels for 30-60 seconds continuously each day. Preferably after your symptoms have calmed down a bit.

6. Progressively increase your mileage. Going for a 4 mile run after a month of no running is a huge training error. Sometimes those muscles just need to be conditioned correctly. 

7. Try a different shoe with a lower heel height. Pair this with the other solutions. A thicker heel can mean greater shin muscle load. And that thick heel is often the reason people heel strike hard in the first place. 

If you battle repeatedly with shin splints, consider having a thorough running technique and gait evaluation. Yes, I can get the pain to go away easily with a couple treatments but don’t you want to keep it away permanently? A couple of small changes can mean a huge difference in your pain onset.

I can be reached at derek@mountainridgept.com if you have any questions. 

Please share this article with your running friends! To receive updates as each blog comes out, complete the form below. I can be reached at derek@mountainridgept.com if you have any questions. 

Training errors in the athlete, part 5

Training with other people all the time. Do you thrive on attention and praise in order to push through a workout? Sometimes you just need to go it alone to build the mental fortitude required to perform at a higher level. I mean Rocky Balboa trained alone most of the time and he seemed pretty talented so that has to be a sign it will work for you too. Gonna fly now...

I don't see anyone else around, do you?

Moving on to the other end of the spectrum, there’s the chance that other athletes can push you too hard, too often. Peer pressure kicks in and although your instinct says “that’s enough,” you go beyond your safe limitations and become injured. Save it for the competition. That’s where it is nice to have a coach to tell you when to shut it down.

Skipping the warm-up. Warm your muscles up slowly and they will perform better. A gradual warm-up can improve performance. Research indicates muscle fiber exposure to lactic acid just before intense exercise allows the fibers to tolerate even more lactic acid production. The physiology of the muscle fiber can function better at a higher temperature too (up to a point of course).

According to a 2012 literature review in BioMed Central Medicine, a proper warm-up containing “stretching, strengthening, balance exercises, sports-specific agility drills and landing techniques” can be effective for preventing injury. This is unfortunately more involved than many athletes envision when thinking about a warm-up routine and they shy away from it as a result. 

At the least, warming-up should be a whole body routine that emphasizes full joint mobility, a gradual increase in heart rate, directional changes, and most importantly, rock music. The warm-up period, especially just before a competition, can be a powerful psychological motivator.

Ignoring joint mobility and flexibility. Some people have really poor mobility. I don’t mean, can you bend over and touch your toes? I mean will your hip flex to a full 120 degrees to allow you to squat all the way down at Crossfit? Do your ankles have the full range of motion necessary to prevent your arch from collapsing while running? Limits in mobility set by a single joint or muscle can impact movement further away than you might realize (ie. ankle movement can change hip movement).

The type of exercise you expect to participate in should dictate what motions you need to improve. If there are specific known limitations, they should be addressed in order to decrease stress on adjacent tissues and regions. Mobility limitation is the reason that the Crossfit “Mobility WOD” exercises exist. The point is that you have to take care of your body with a little routine supplemental work in order to enjoy your regular sport safely and improve performance. 

To Foam Roll the IT Band or Not to Foam Roll the IT Band?

There are about 50,000 articles on rolling or not rolling the IT band, or iliotibial band, on the internet right now. So now there’s 50,001 with my addition. There’s every topic from “you’ll never get the ITB to stretch out” to “don’t roll it because the problem is actually at your hip” to “keep rolling the ITB.”

I agree, the ITB is so thick and strong you are wasting your time to try to specifically stretch it or roll it out. According to an older article (1931) from the Journal of Bone and Joint Surgery by C.M. Gratz, MD:

“The specific gravity of fascia lata is about 1.31 and the average ultimate tensile strength is approximately 7,000 pounds per square inch. Soft steel has a specific gravity of 7.83 and an ultimate strength of about 45,000 pounds per square inch. Thus fascia lata is nearly as strong as soft steel, weight for weight.”

Image courtesy MedBridge Education

The IT band needs to be a strong material. The IT band functions are to stabilize your knee and produce hip movement by working along with the tensor fascia latae and gluteus maximus muscles (refer to the image below). And yes, lateral knee overuse injuries, including IT band region problems, tend to be related to weakness or abnormal activity at the hip and trunk muscles. Maybe something is wrong down at the ankle and foot too.

You shouldn’t be relying on the rolling, or any soft tissue technique for that matter, to make up for lost strength or bad exercise mechanics. Those body mechanics need addressed and your strength needs to improve. It wouldn’t surprise me that a lateral knee pain sufferer would also have weak gluteus medius and gluteus maximus muscles. Most people could use stronger glutes. And maybe you shouldn't have suddenly done a 2 hour long workout when your longest had been 1 hour. 

What the anti-rolling crowd is forgetting is the fact that the IT band is covering a pretty big portion of quadriceps muscle. Because it’s generally a positive to routinely roll or massage the rest of the quadriceps, why would you suddenly neglect such a big part of it? I wouldn’t, personally.

And what if that lateral knee pain is actually coming from trigger points in the quadriceps? At least the rolling was helping to keep the quadriceps relaxed and generally making the nervous system happier.

If you bought into the “no ITB rolling” philosophy, think it over again. At the very least, use a tennis or lacrosse ball to roll the thigh directly in front of the IT band and directly behind it. Take care of your quadriceps and hamstrings muscles. Use the ball, massage stick, or foam roller on the tensor fascia latae muscle too, up at the front/side of each hip.

Strengthen your hips and keep on rolling.

Training errors in the athlete, part 4

Underestimating the importance of proper recovery. When it’s time to work hard in a workout or competition you need to have some gas in the tank. That tank doesn’t get filled up without good recovery techniques like full days off, active recovery days, consistent sleep, compression, nutrition quality and timing, proper hydration and muscle maintenance.

If you start every competition or workout on a half tank, guess what happens? You go half as far with half the intensity. Sometimes that's intentional and planned. But many times it's not. Then as injury and overtraining occur, you have to ask yourself, “What am I really getting out of this?” In order to feel your best, remain healthy, and perform at your best, recovery is a huge part of the equation. Don't dig yourself into a hole that you can't get out of. 

Not working hard enough to produce a strong stimulus that the body wants to adapt to. Athletes are supposed to be constantly pushing their bodies on many of their training days. That’s how you become better, right? Unfortunately it’s also how you become overtrained, injured, stale, and burned out.

This leads you to constant training at a moderate effort on “dead” muscles. Or running the same distance every day. Monotony is the straw that broke the camel’s back. For runners, yes, you need days to emphasize aerobic conditioning in easy efforts ranging from 30 minutes to 3 hours. Other days you can have interval training that emphasizes anaerobic work at a really high effort for anywhere from 30 seconds to 5 minutes. Sure there’s a place for a moderately paced tempo run of 15 to 60 minutes, but not every day.

Strength training athletes need to avoid constantly using a weight that causes failure at 10, 12 or 15 repetitions. Or always doing just one set. If you are really after a change in performance, there needs to be a training cycle where the weight is significant enough to cause failure at other points, like 8, 5, or even 3 repetitions. And other times it’s fine to do 20 repetition sets. The point is, change the stimulus.

Indoor general fitness athletes are often one of the most guilty of this mentality. Three and four times per week they bounce from one cardio machine to another, being sure to start breathing harder and break a sweat at each machine for 10 or 20 minutes. They occasionally check their heart rate and compare it to the machine’s chart. No surprise to see a heart rate of 70% of the predicted maximum. And they wonder why they never see significant fitness changes.

Then there are the athletes that push a little harder but it’s just to that 85% level, which definitely hurts more. But then they struggle to sustain it as one steady effort for longer than 10 minutes (because it hurts) at which point the effort drops a notch. Meanwhile, other people in the gym are barely working at all.

In any sport, the key is variety. Variety in intensity, duration, training surface, speed, force produced, and direction of movement. Yes, you want adaptation to a consistent stimulus for a while but then you have to change that stimulus to continue making gains. 

Ignoring injuries when you first begin to have symptoms. Some injuries classically only hurt at certain times in their formation. That doesn’t mean they aren’t a problem. It doesn’t have to hurt all of the time to be a problem. Don't ignore it. Never ignore it. Yes, you can try to treat it yourself for a little while. That really might work.

But please make your life and my life easier by just coming to Physical Therapy within a couple weeks of the problem onset, even if it’s just for a consultation. If you don’t like what I have to say about it then seek another opinion. Regardless, if you intervene early, and start the right treatments, your recovery time is going to be drastically different.

For instance, if I see someone with back pain from a sacroiliac joint sprain in the same week they are injured, then they often recover in well under a week. If the sacroiliac joint has been a problem for 2 months and had no proper treatment, then buckle up for at least a month of consistent work. #getPT1st

Training errors in the athlete, part 3

Relying on ibuprofen, naproxen, acetaminophen or other over-the-counter drugs during and after exercise to counter muscle soreness. It’s one thing to take medications for a known sprain of a joint or strain of a muscle. Those are good reasons to use these medications because the level of tissue damage is drastically greater. In that case, if you normally do well with over-the-counter medications then, by all means, take them. But stay hydrated and don’t exercise heavily while taking them.

Our bodies adapt to exercise by rebuilding the minor tissue damage that occurs during the exercise, but with a little better structure. By using anti-inflammatories, recent studies indicate you are actually hampering some of your body’s normal recovery processes. Let nature run its course.

Focus instead on good nutritional habits, like eating during and immediately after exercise.  Patience and tolerance as your body recovers after exercise are key.

And please don’t take anti-inflammatories while you are exercising because:

  • They can be highly damaging to your kidneys as you become dehydrated.

  • They can impact your blood pressure negatively.

  • There are also problems in the way the drugs act with higher body temperatures and can change otherwise normal processes in your body during exercise.

  • Their intake can lead to intestinal bleeding, cramping, diarrhea and maybe even a trip to the emergency department if the dose is high enough and you’re dehydrated.

Not performing plyometric training. It’s probably not a good start if you are currently saying “What is plyometric training?” Plyometrics can be a great way to increase overall speed and power. They are also great for improving your confidence with foot placement and directional changes because more advanced exercises require agility as well. And if you have a hit a plateau in your training, they can help you break through it. That can be true for sprint athletes and endurance athletes. Keep your body guessing.

Lateral hops are a great plyometric Drill for many athletes

Lateral hops are a great plyometric Drill for many athletes


Not having goals, short-term and long-term. Is your long-term goal to be a 5K runner until you are 80? To stay in shape to chop two cords of firewood next month without back pain? To squat 300 pounds for a one repetition maximum in three weeks? To avoid a family history of cardiovascular disease with indicators like blood pressure below 130/75 until you are 50? Write your goals down. Determine a time-frame. Maybe six weeks short-term? Maybe six months long-term? It’s going to depend on the type of goal. And 40 years long-long-long-term? Remember the SMART concept for making goals - specific, measurable, achievable, realistic, time-bound. Simply saying “I want to be stronger and faster” is not specific, measurable or time-bound. Achievable and realistic, maybe. But how will you decide achievement of being stronger and faster without a measurement?

8 Shoulder pain and rotator cuff care tips

While shoulder pain can be caused by a variety of injuries, rotator cuff impingement is one of the more common causes. It can occur in a variety of people, younger and older. The rotator cuff is made up of four muscles on your shoulder blade that stabilize your shoulder joint, as seen below. Impingement occurs when part of the tendon is repeatedly compressed. It is often poorly managed with corticosteroid injections. Mechanical stress that would have caused these tendons to become painful requires mechanical treatments, not a drug, for true correction. 

You are at risk for rotator cuff tendon or "subacromial" impingement if you currently have or have had:

1. Decreased total shoulder motion - Can you get your arm straight overhead? Can you touch your hand all the way up to the bottom of your opposite shoulder blade?

2. A rotator cuff muscle or tendon injury, like a strain or a tear - This would have been diagnosed by a medical professional.

3. A “frozen” shoulder - Also would have been diagnosed by a medical professional.

4. Poor trunk and shoulder blade posture - All people are guilty of this at some time or another. We round our backs and let the shoulders rock forward. We drop our heads forward and down.

5. Weak rotator cuff muscles - This applies to many people, even those that have labor jobs or athletes that demand heavy use from their shoulders.

6. Weak shoulder blade muscles - This occurs in most people, unless they are specifically strengthening these muscles and is often a result of the poor trunk posture. 

7. Irritable rotator cuff muscle trigger points (aka knots) - Applies to many people, unless they regularly have a deeper massage or routinely dig and smash on those knotted trigger points themselves.

Certain activities also make shoulder impingement more likely:

1. Long periods of work with the arms overhead

2. Participating in throwing sports, like baseball

3. Participating in swimming, especially freestyle, backstroke, and breaststroke

Combine any of these activities with the problems listed above and it is not unusual to start having shoulder pain from rotator cuff impingement.

Here is a list of items you can try to decrease the chance of developing a rotator cuff impingement issue or to address an early rotator cuff problem.

1. Massage the rotator cuff muscles with a ball, like a tennis ball, while leaning against a wall. A couple of these muscles are easy to reach because they are on the back of your shoulder blade. Move your body up and down and side to side while keeping a moderate pressure on the ball. Focus on the more tender areas. Perform for 1-3 minutes.  

2. Light rotator cuff muscle activity with your arm at your side. This could be as simple as the “isometric” exercises in the pictures below. Push 5-10 seconds with a minimal to moderate level of pressure. The goal is to perform repetitions without pain, not to create maximum force. More is not always better. Try just 5 repetitions of each position early and if that lowers your pain then attempt to work up to 20 repetitions over one week of time.

Hand pushes into wall 5-10 seconds from the shoulder. 

Hand pushes into wall 5-10 seconds from the shoulder. 

hand Pushing into wall 5-10 seconds from the shoulder. 

hand Pushing into wall 5-10 seconds from the shoulder. 

Hand or wrist pushes into wall 5-10 seconds from the shoulder. 

Hand or wrist pushes into wall 5-10 seconds from the shoulder. 

Wrist pushes into wall 5-10 seconds from the shoulder.

Wrist pushes into wall 5-10 seconds from the shoulder.

3. When sitting or standing, focus on remaining tall with your torso posture. Focus on the shoulder blades squeezing back even if it’s just a little more than your usual. A small change can go a long way toward decreasing stress on the shoulder muscles and tendons.

4. For swimmers, address any swimming technique issues such as crossing midline during the freestyle stroke. You may need to discuss this with a swim coach or a medical professional experienced with treating swimming athletes.

Copyright Johnson, JN in Physician and Sportsmedicine, January 2003

Copyright Johnson, JN in Physician and Sportsmedicine, January 2003

5. Move your keyboard and mouse closer toward your body if you work at a desk in order to keep your arms closer to your side and not reaching forward.

Screaming for shoulder and neck problems. 

Screaming for shoulder and neck problems. 

Get a little bit closer...

Get a little bit closer...

6. Avoid working overhead. This is especially true if you have to push firmly with the arm, like while using a drill or paint roller.

7. Do not completely avoid moving the arm. This increases the chance of developing stiffness in the joint that could lead to adhesive capsulitis, otherwise known as a frozen shoulder. Please don't put your arm in a sling unless a medical professional determines there's a bone broken or you just had surgery on the shoulder.

8. Avoid heavy overhead lifting. Of course, heavy means different things to different people. If you *think* it’s heavy at all, it probably is.

Don’t let your shoulder pain stick around for too long. One to two weeks is reasonable if it is steadily improving from a moderate level of pain. In some instances, these suggestions can help shoulder pain. By no means are they meant to resolve a major shoulder injury though. They are not intended to provide diagnosis or true medical treatment. When in doubt, seek medical advice from a qualified medical professional.

If you have any questions about resolving shoulder pain with your work or hobbies, mail me at mountainridgept@gmail.com.